Flight Simulator X & Prepar3D
We do notdon't use livery installation programs provided by developers,developers – such as PMDG Ops Center.Center. TheWhy? reason for this is that mostMost of them require that you have their software in order to create their proprietary package. Because our paintersPainters are volunteers, many ofdon't us do notactually own the aircraftsaircraft; and thustherefore, it makes it very difficult to create those packages. It also means that updating liveries or making changes is even more difficult.
You have to manually install all liveries into Flight Simulator X or Prepar3D.
Flight Simulator X - Important
Most Prepar3D liveries are compatible with FSX --– in rare cases you may come across one that does not. We do not provide FSX compiled zip files for those planes in which P3D liveries work,work; the FSX liveries you see would only be for FSX default provided aircraft by Microsoft.
If you have an FSX equivalent of an aircraft, you will download their Prepar3D version.
Here's the tricky part;part... you, the pilot, areYou're required to ensure the texture.cfg file (itit's located in the texture.ABCD folder of our zip file) matches that of the FSX plane. The easiest way to do this is toto:
| 1. |
Locate and open their texture.ABCD Folder (whatever the name is) and open up texture.
Compare it to the one we provide. In some cases,
1. Download the livery that you wish to install from the Walker Air Transport site.
2. Open up the zip file of the downloaded aircraft.
Depending on the livery, you may have (1) or more texture.ABCD folders, or if there is an additional folder for other modifications there will be an accompanying read-me file that will instruct you on what to do.
3. Copy the texture.ABCD (if there is more than 1, copy all of them) to your aircraft's folder where the liveries are stored.stored in your aircraft's folder.
NOTE: If there's more than one (1), copy all of them.
Most aircraftsaircraft are installed to: {simulatorinstallfolder}\SimObjects\Airplanes\
You may also find them located in: Documents\{simulator-addons}\
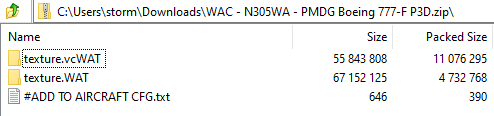
We're installing the PMDG Boeing 777-F livery and will use that as an example.
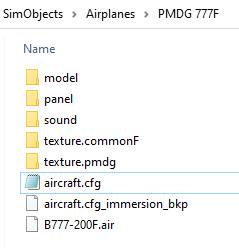
| The aircraft is located at {simulatorinstallfolder}\SimObjects\Airplanes\PMDG 777F |
We're going to copy the texture.vcWAT and texture.WAT folders into this folder.
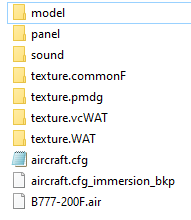
texture.vcWAT is the virtual cockpit for the 777-F; if you were to delete this folder the cockpit would return to the default Boeing Brown instead of the WAT Black Cockpit. This is not the case for every single livery, but is just a FYI if you come across other planes. You can usually find exactly what folder/files pertain to the cockpit panels and simply delete them to return the cockpit to the original color.
NOTE:Note: we haveWe've stopped making black cockpits, however we left the ones done still out there.
Next step we want to do is addAdd the aircraft data so that the livery shows up. To do that:
|
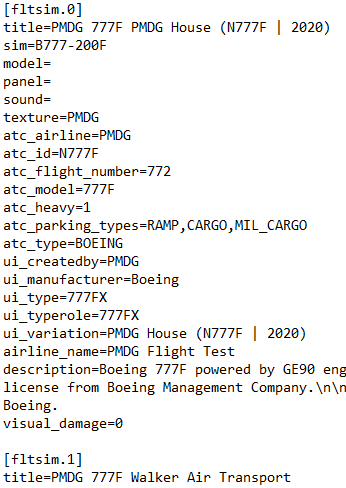
Open |
Left: aircraft.cfgcfg | Right: #ADD#ADD TO AIRCRAFT CFG.txt
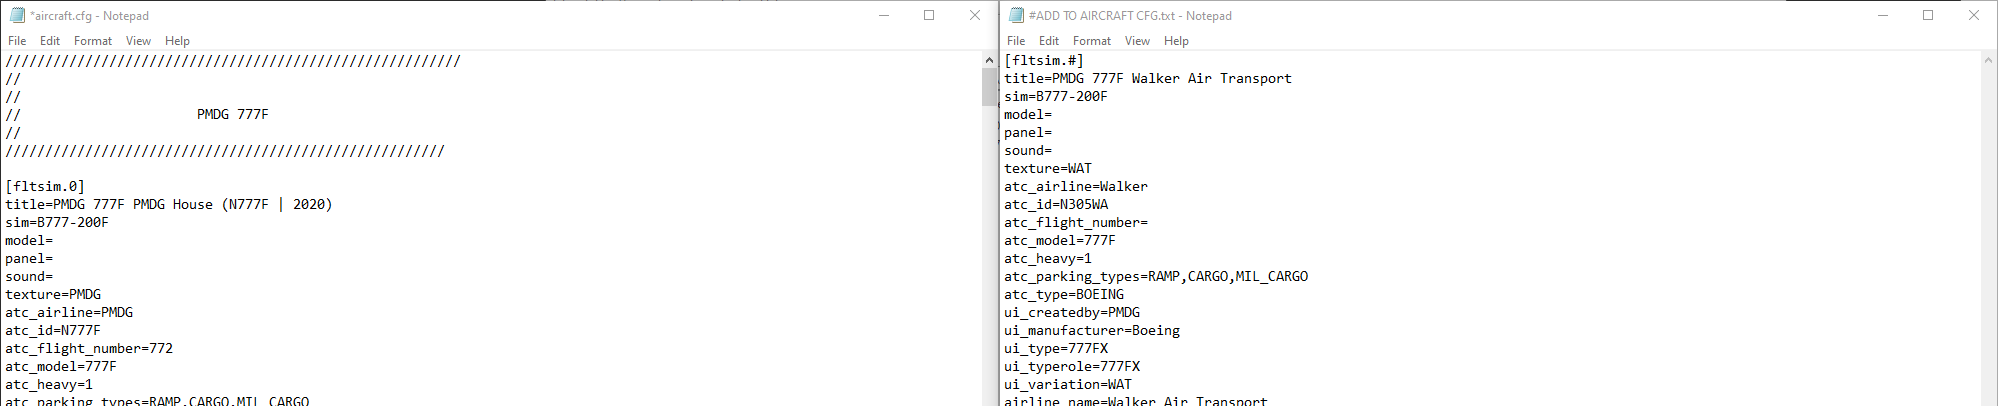
[fltsim.#] is a sequenced header for the liveries --– if you look through through aircraft.cfgcfg, you may notice [fltsim.1], [fltsim.2], etc. You willYou'll need to scroll to the very last entry and note the number, number. you areYou're picking the next number after that.
Copy the contents of the #ADD TO AIRCRAFT CFG.txt and paste itthem beneath the very last entry in in aircraft.cfg – as likeillustrated so.below.
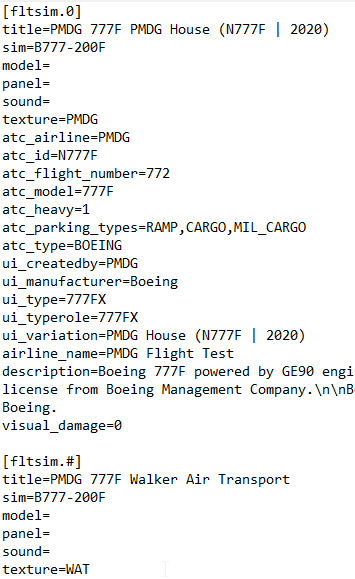
In the case of this aircraft, our next [fltsim.#] number will be "1"'1' (they always start with 0.)
Let's change the # to a1. 1 and thenThen, it should appear like so.
Save the file and load your simulator.Simulator.