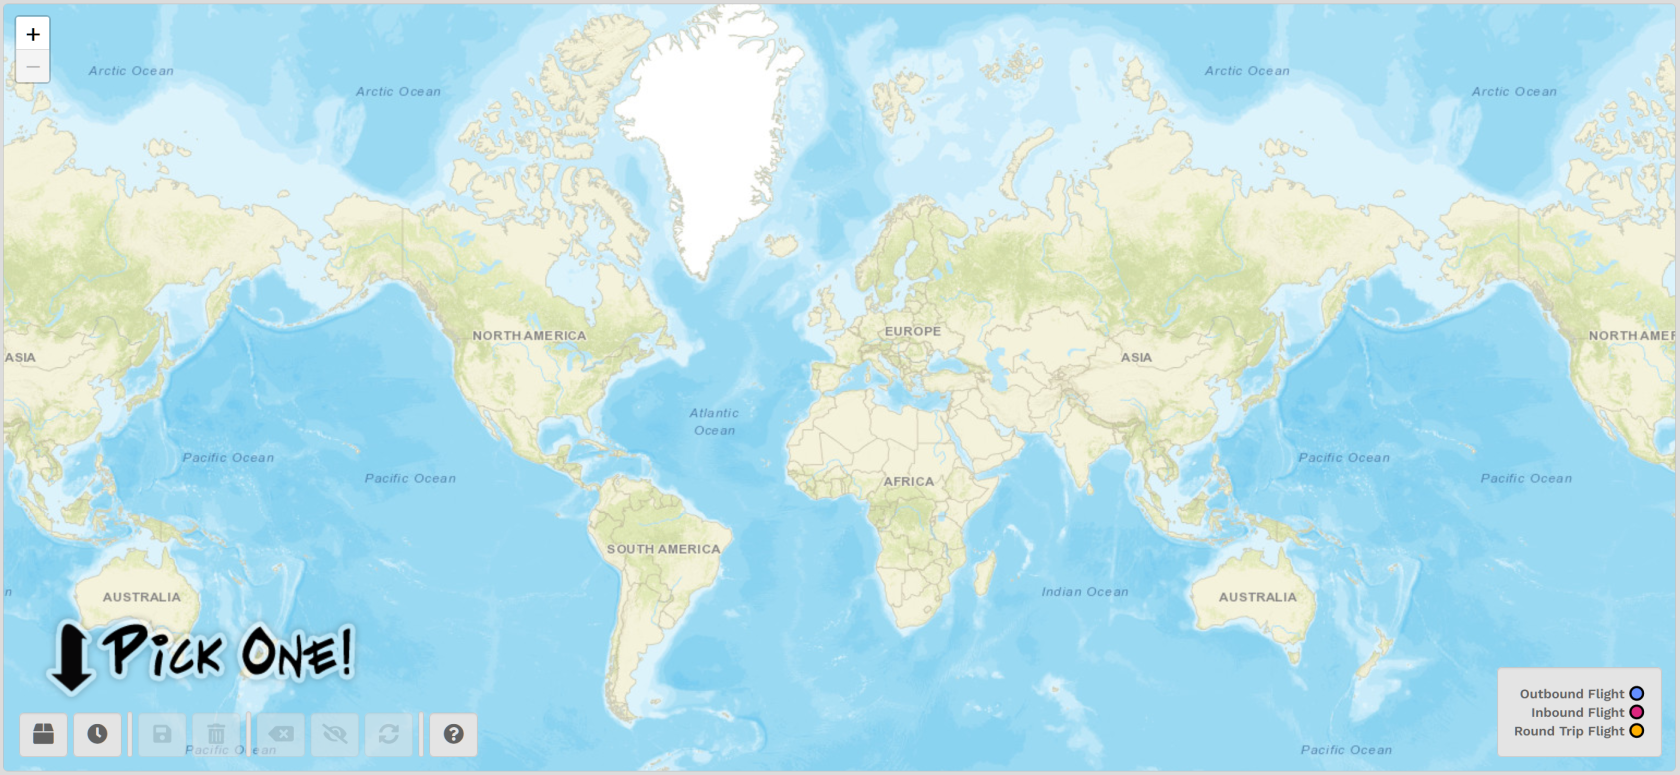
# Flights – Map
---
[](https://docs.walkerair.us/uploads/images/gallery/2021-11/image-1638131739994.png)
This map will show you what *route availability* exists for **Cargo** and **Scheduled** operations by referencing those in our database containing over 640,000 individual entries. Use it to plan a single flight or a series of flights. It’s very useful in helping you avoid getting stuck somewhere and having to purchase a Jumpseat when you're 'out on the road'.
---
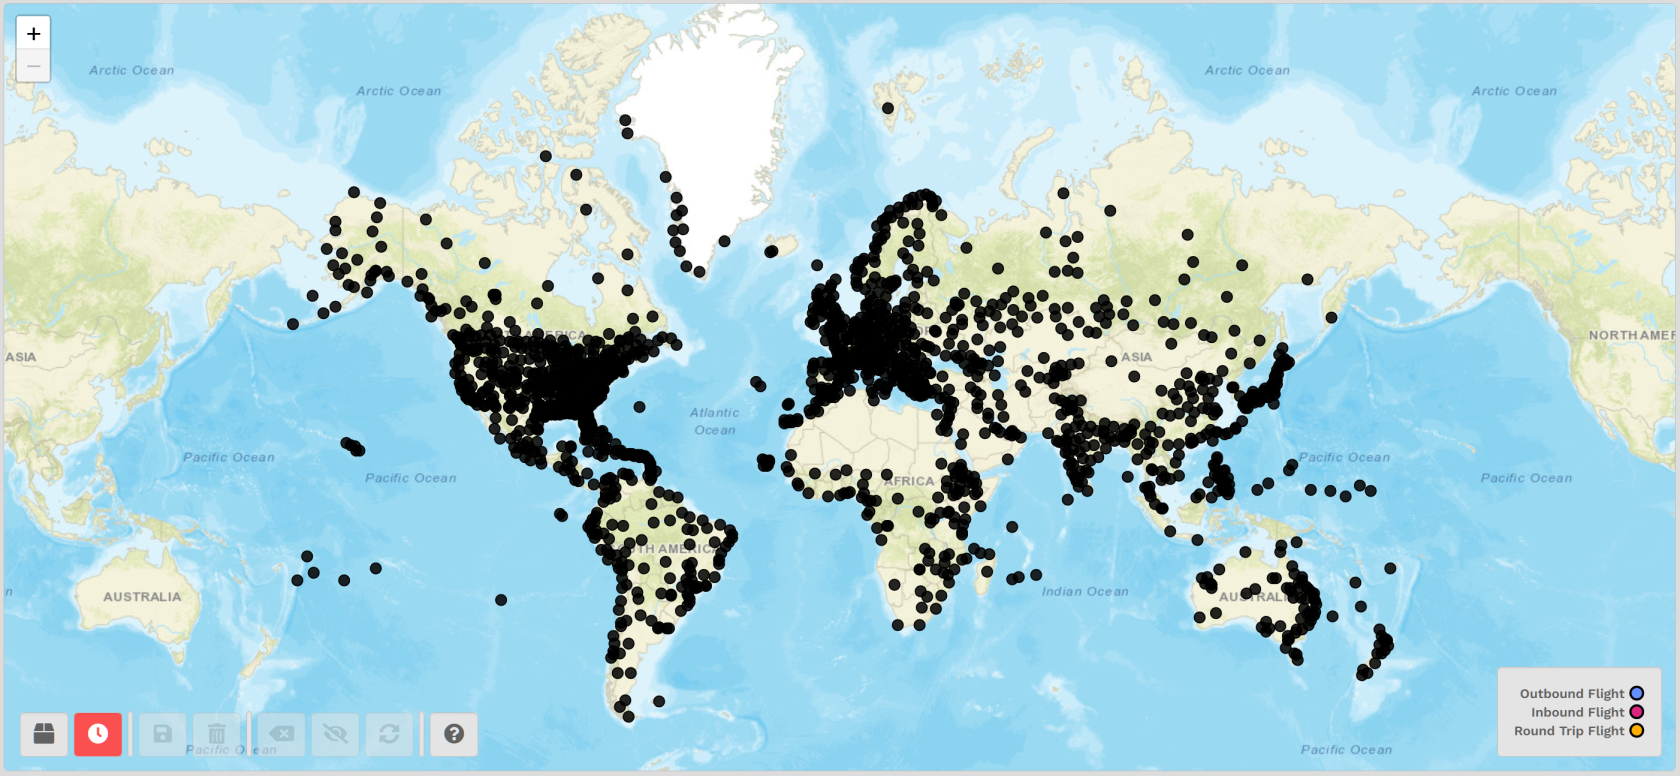
This is the map's ***default view**.* Zoom out and reposition it to view the part of the world you're interested in seeing.
**NOTE:** *Zoom in or out by using the '+' button – **or** – your mouse's scrolling wheel, until the individual black dots are more distinct.*
[](https://docs.walkerair.us/uploads/images/gallery/2022-01/image-1642176080600.png)
*For the purpose of illustrating the features of this tool, **Scheduled** Operations will be used; however, the steps detailed here will be the **same** for both Cargo **and** Scheduled flights.*
| **Cargo** | **Scheduled** | | [](https://docs.walkerair.us/uploads/images/gallery/2022-01/image-1642175800948.png)
| [](https://docs.walkerair.us/uploads/images/gallery/2022-01/image-1642175848475.png)
|
| Choose an **Operation Type** by clicking its button at bottom left of the map. |
| **[](https://docs.walkerair.us/uploads/images/gallery/2022-01/image-1642176191912.png)** | After clicking one of the Flight Operation buttons, the map will transition from what you see above to what appears below. |
[](https://docs.walkerair.us/uploads/images/gallery/2022-01/image-1642176491353.png)
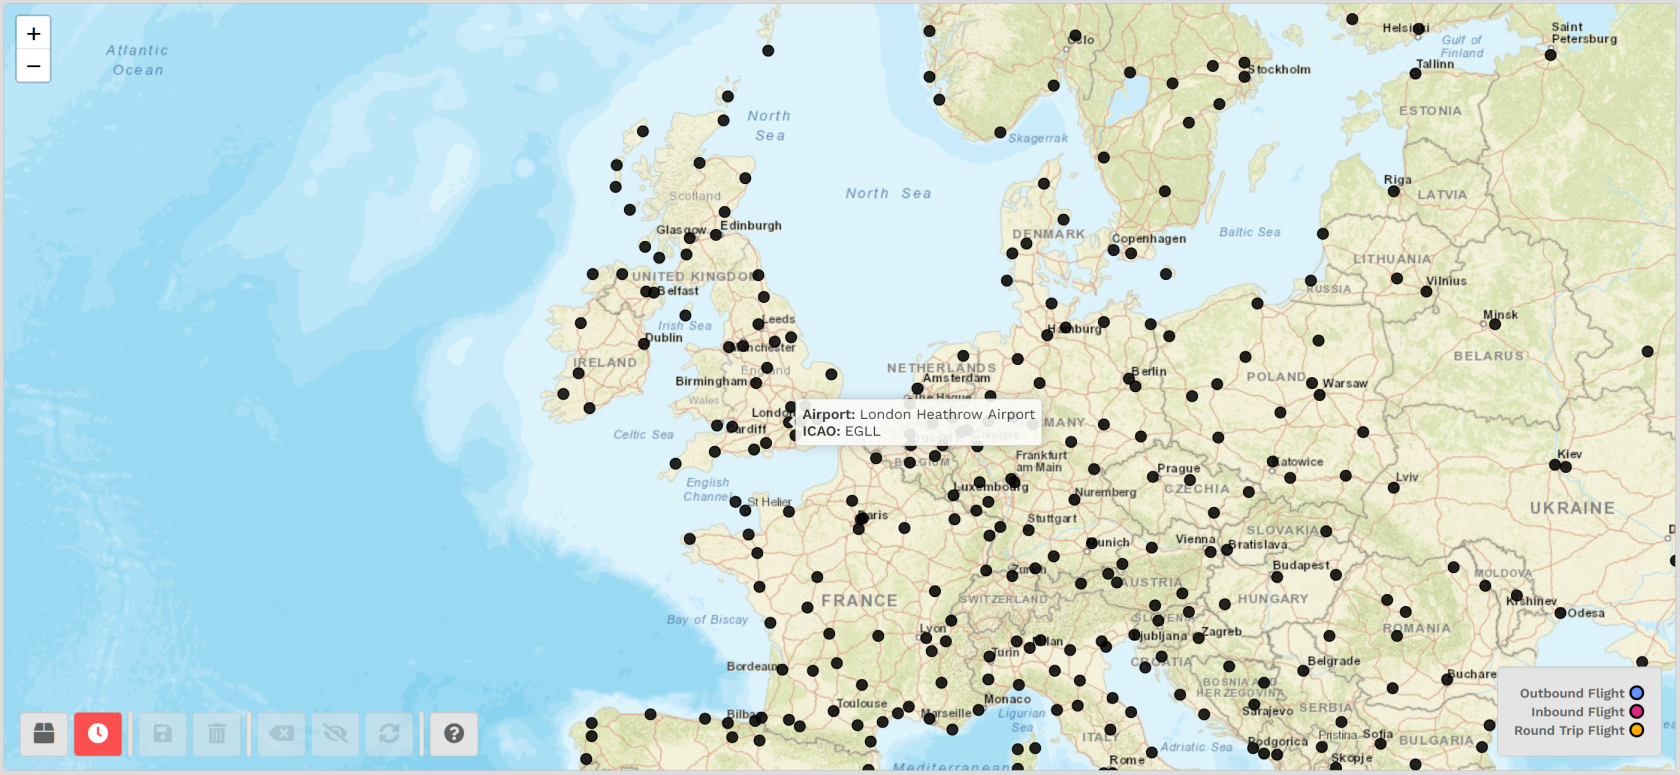
**Our Scenario:** While you can begin at *any* airport in the world – *any* black dot on the map – let's just say we're interested in seeing what flight routes exist using *EGLL London Heathrow Airport* as a starting point...
Once zoomed in, locate *EGLL London Heathrow Airport* by hovering your mouse over the black dots you see until *EGLL's* identifier appears (*see below*).
[](https://docs.walkerair.us/uploads/images/gallery/2022-01/image-1642177254049.png)
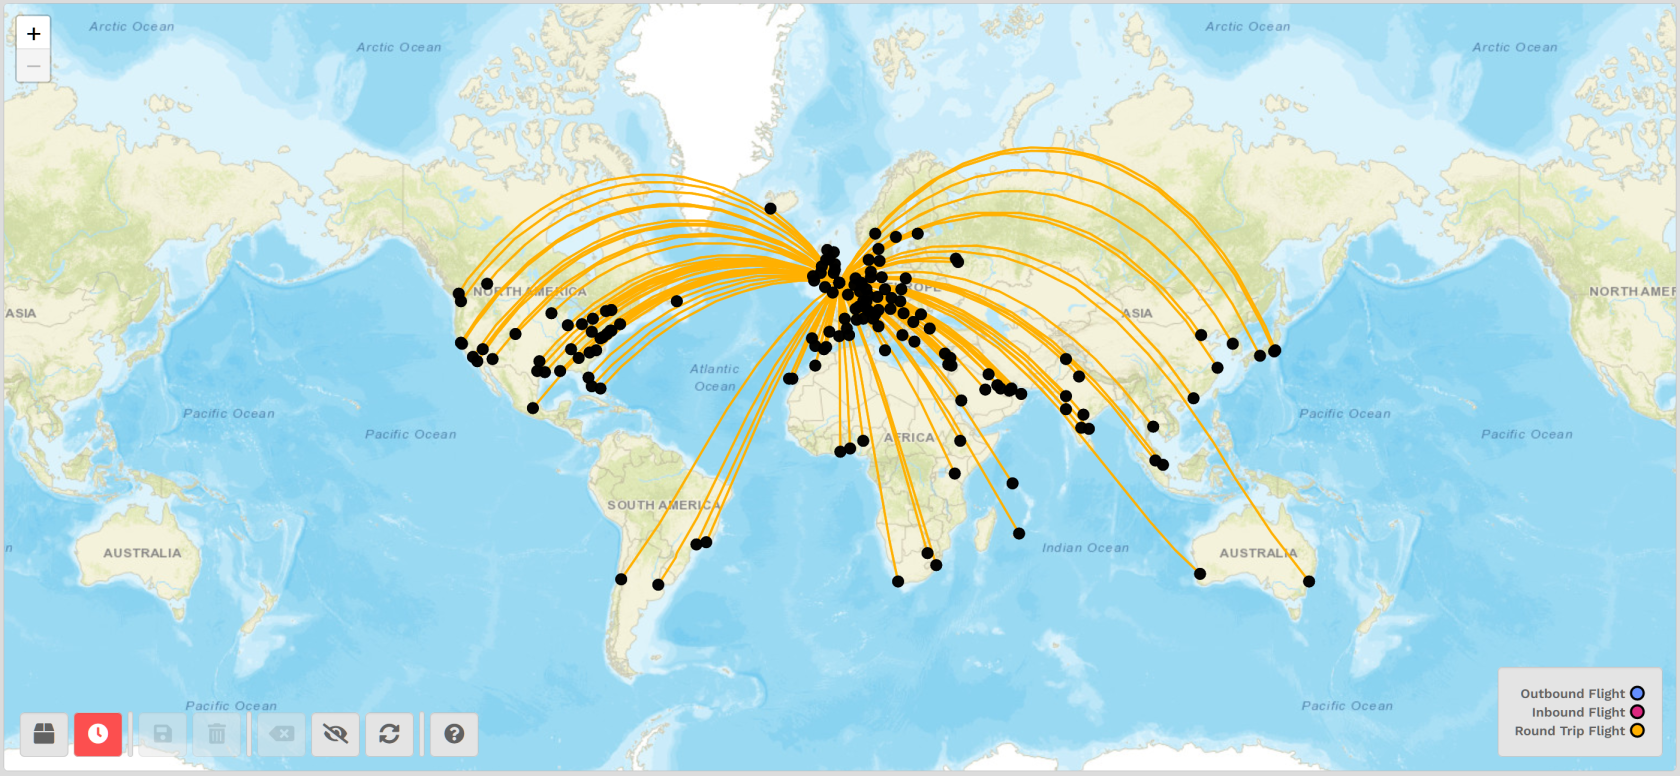
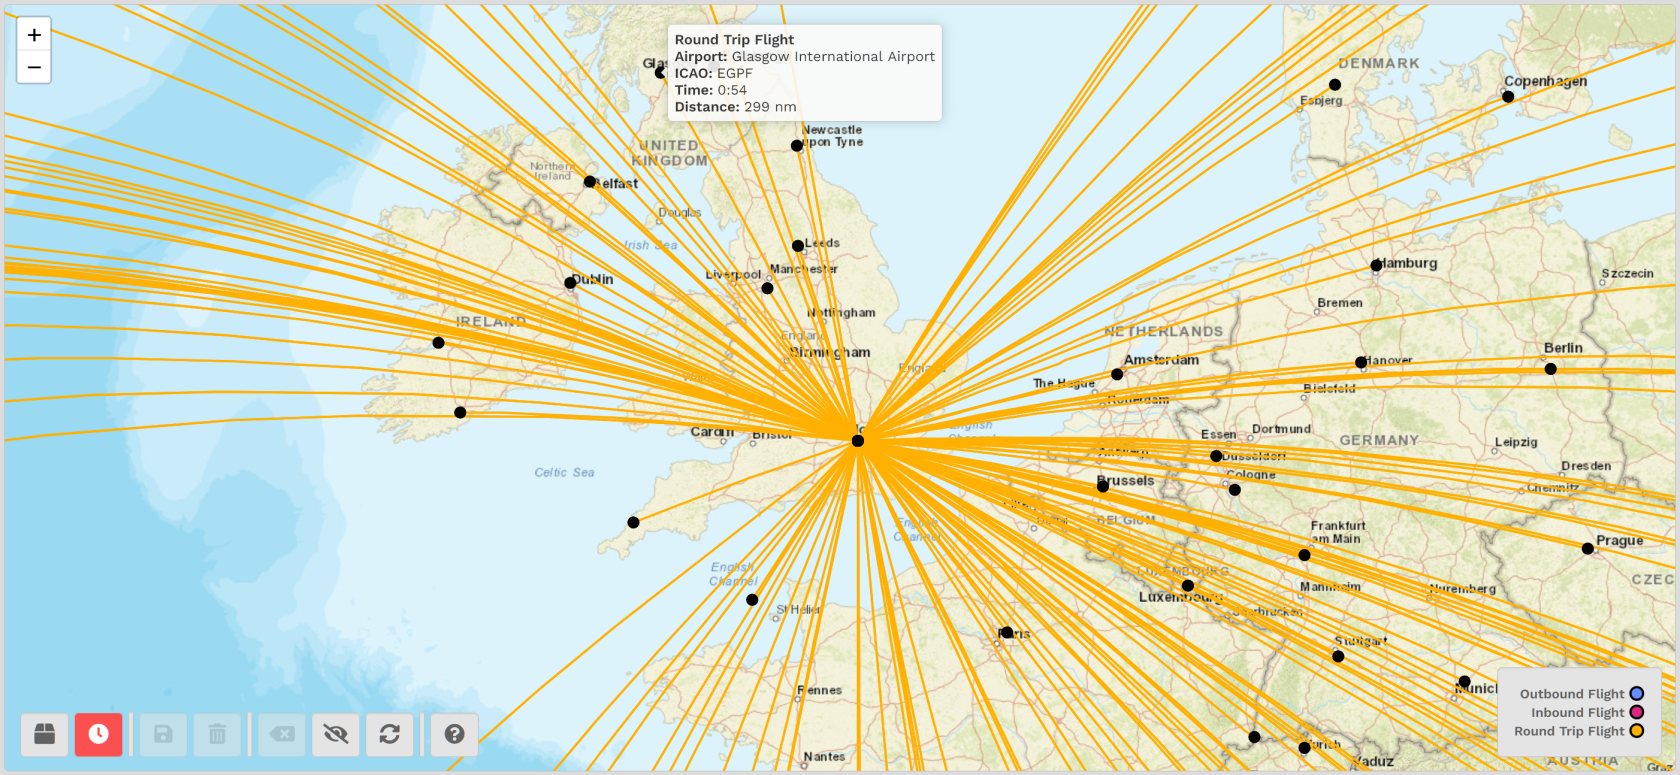
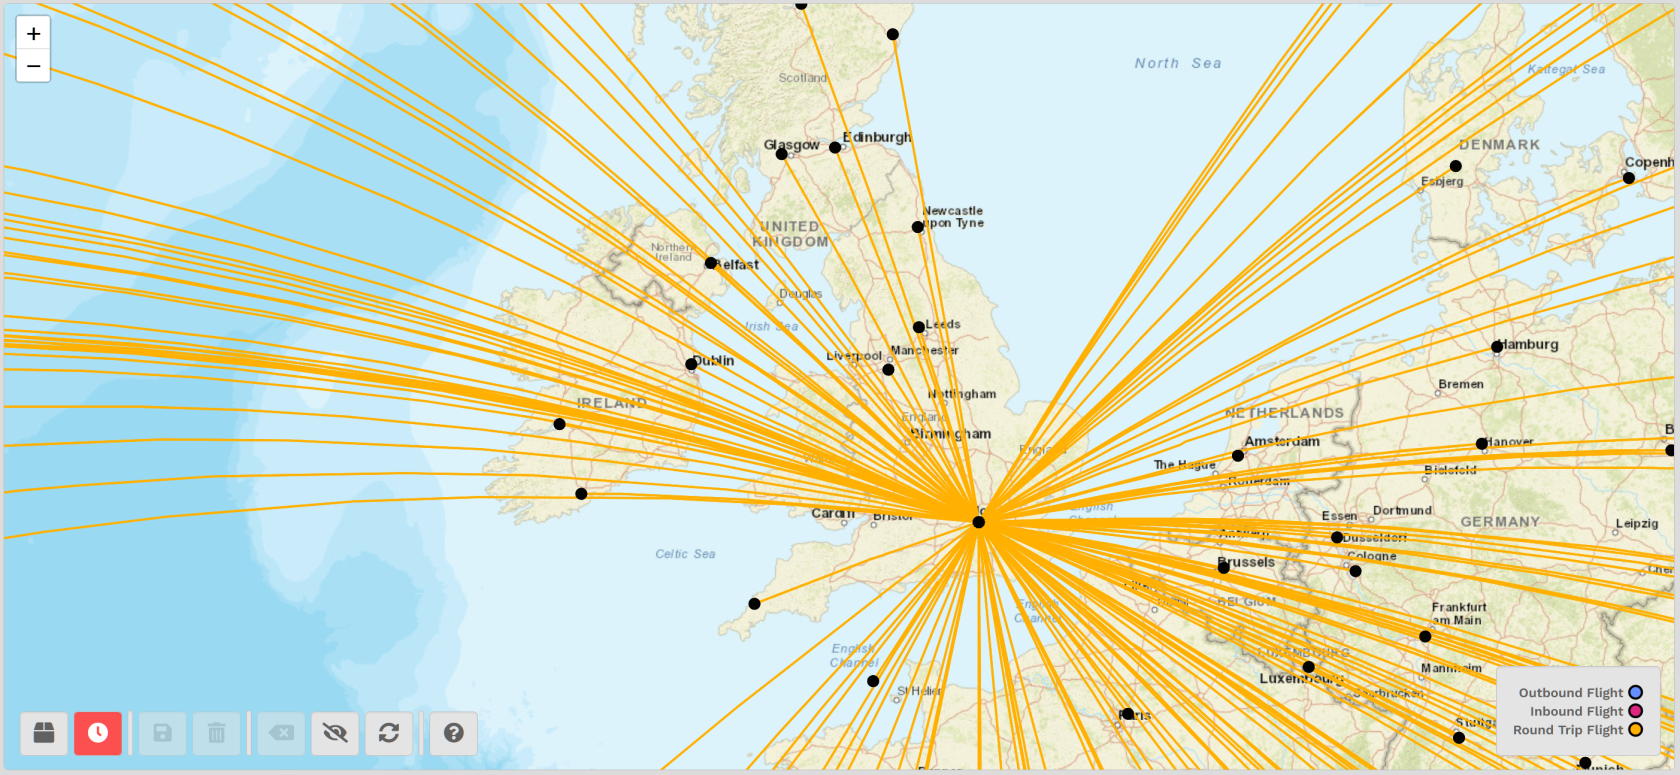
Click the black dot associated with *EGLL*. The map will take a moment to refresh.
Afterwards, you'll see **all** of the **outbound** flight routes available from there.
*To gain a more 'whole world' perspective, zoom out using the '-' button – **or** – your mouse's scrolling wheel.*
[](https://docs.walkerair.us/uploads/images/gallery/2022-01/image-1642180771641.png)
Based on what's displayed on the map, you can see there are quite a number of **Round Trip Flights** available from *EGLL*.
#####
---
##### **Single Flight**
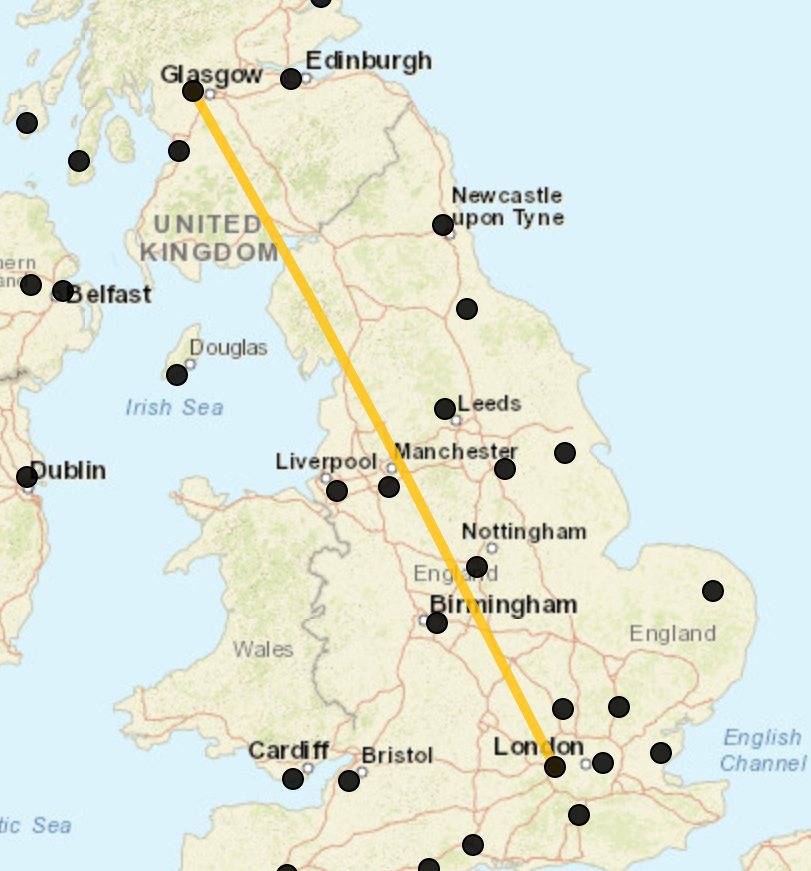
Let's determine if there's a flight from *EGLL* to *EGPF Glasgow International Airport*. Try to locate *EGPF's* black dot on the map.
| **If you can locate your desired airport on the map at the end of a yellow line, then a Cargo/Scheduled route exists**.
**If you can't locate your desired airport on the map, a Cargo/Scheduled flight does not exist.** |
[](https://docs.walkerair.us/uploads/images/gallery/2022-01/image-1642178213953.png)
| [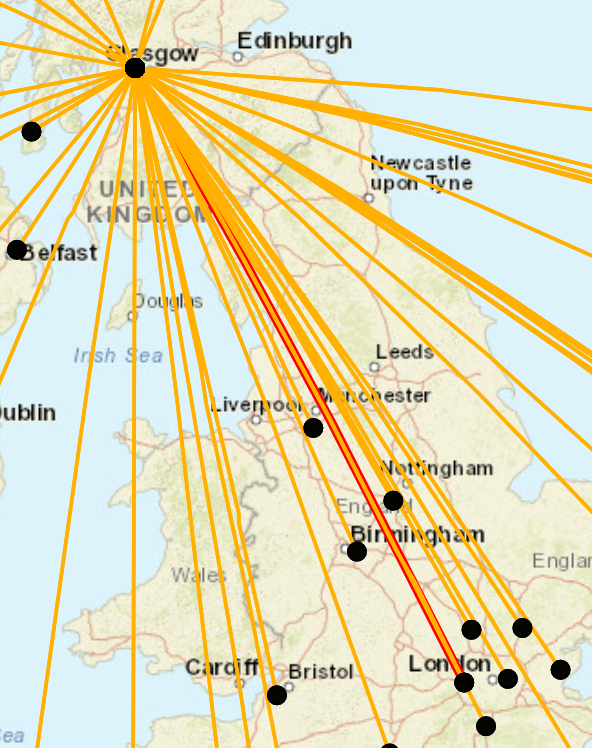](https://docs.walkerair.us/uploads/images/gallery/2022-01/image-1642178360903.png) | Click *EGPF's* black dot.
After doing so, the *EGLL* > *EGPF* flight route will be highlighted in **red**.
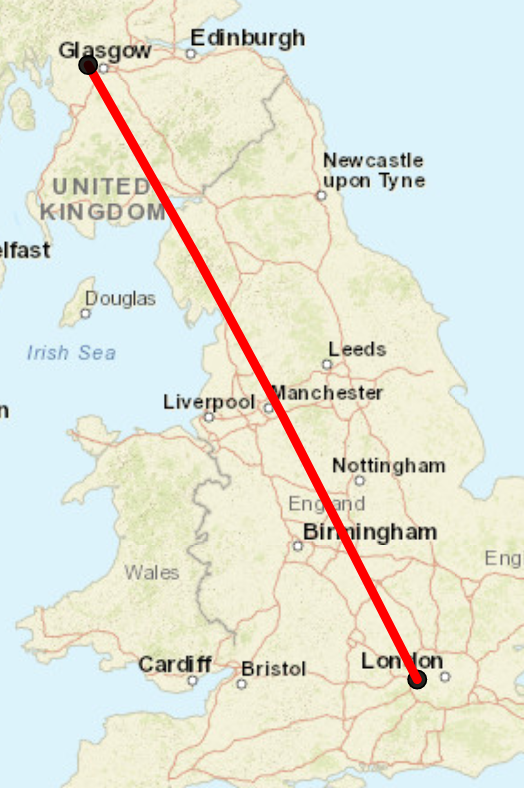
| [](https://docs.walkerair.us/uploads/images/gallery/2022-01/image-1642179176183.png) | **Hide** the available routes to declutter your screen ***at any time*** by clicking the **Hide Available Routes** button.
Make them visible again by clicking the **Hide Available Routes** button a second time.
Repeat as many times as desired throughout your planning process.
|
|
| [](https://docs.walkerair.us/uploads/images/gallery/2022-01/image-1642179952078.png)
| With all available flight routes eliminated from the map, the *EGLL* > *EGPF* route is much more visible.
|
You now have some options...
| [](https://docs.walkerair.us/uploads/images/gallery/2022-01/image-1642181166913.png) | [](https://docs.walkerair.us/uploads/images/gallery/2022-01/image-1642186098911.png) | [](https://docs.walkerair.us/uploads/images/gallery/2022-01/image-1642186177054.png) |
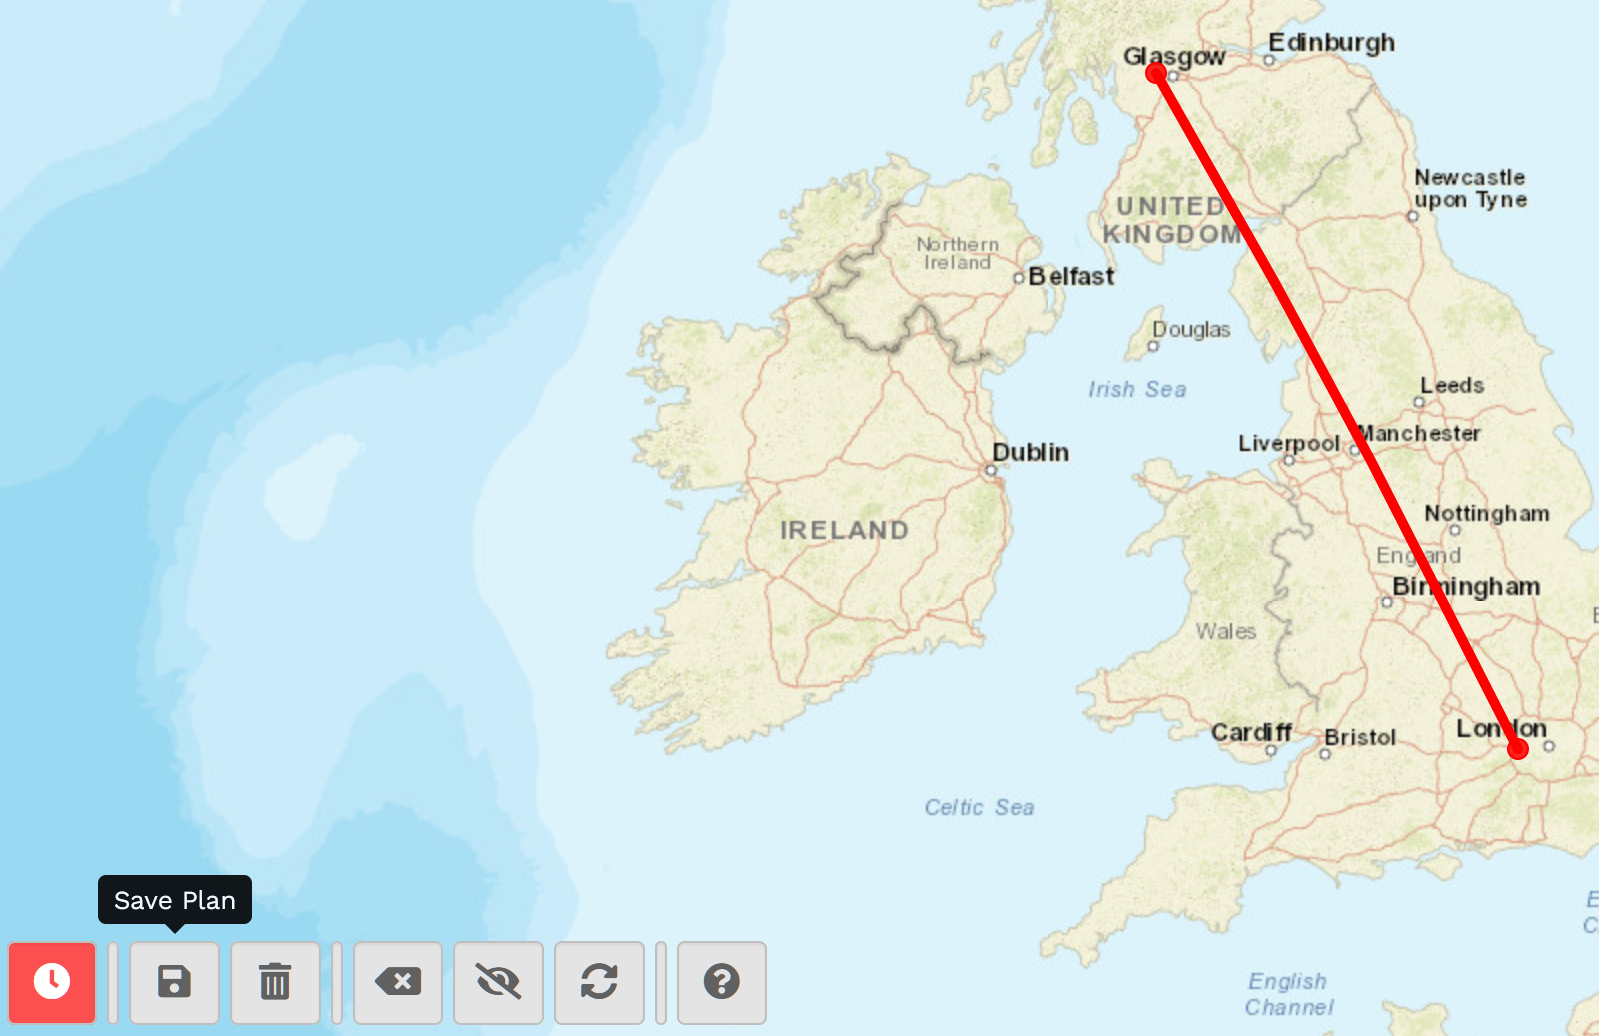
| If you wish to **save** this route, click the **Save Plan** button.
**NOTE:** *Scroll down to see more details about how this feature works.* | If you wish to delete the route you saved, click the **Delete Plan** button. | If you wish to start over, click the **Reload Map** button. |
Continuing with the example above, here's how the **Save Plan** feature works...
After hiding all available routes on the screen, this is what you see.
Locate and click the **Save Plan** button.
[](https://docs.walkerair.us/uploads/images/gallery/2022-04/image-1650582126477.png)
Because this is a **Scheduled** flight, the route will be displayed in the **Flights** > **Scheduled** screen when you open it.
**IMPORTANT:** *This is for display only – it can't be used for actually bidding the flight.*
[](https://docs.walkerair.us/uploads/images/gallery/2022-04/image-1650582330745.png)
---
##### **A Series Of Flights**
Continuing with our scenario, let's plan a *series of flights* from our *EGLL London Heathrow Airport* starting point.
To begin, load/refresh the page.
[](https://docs.walkerair.us/uploads/images/gallery/2022-01/image-1642181661877.png)
Once zoomed in, locate *EGLL London Heathrow Airport* by hovering your mouse over the black dots you see until *EGLL's* identifier appears (*see below*).
[](https://docs.walkerair.us/uploads/images/gallery/2022-01/image-1642177254049.png)
Click the black dot associated with *EGLL*. The map will take a moment to refresh. Afterwards, you'll see **all** of the **outbound** flight routes available from there.
[](https://docs.walkerair.us/uploads/images/gallery/2022-01/image-1642181881178.png)
Continuing with our scenario, let's plan four (4) flights out of *EGLL* and eventually wind up at *OMDB Dubai International Airport*.
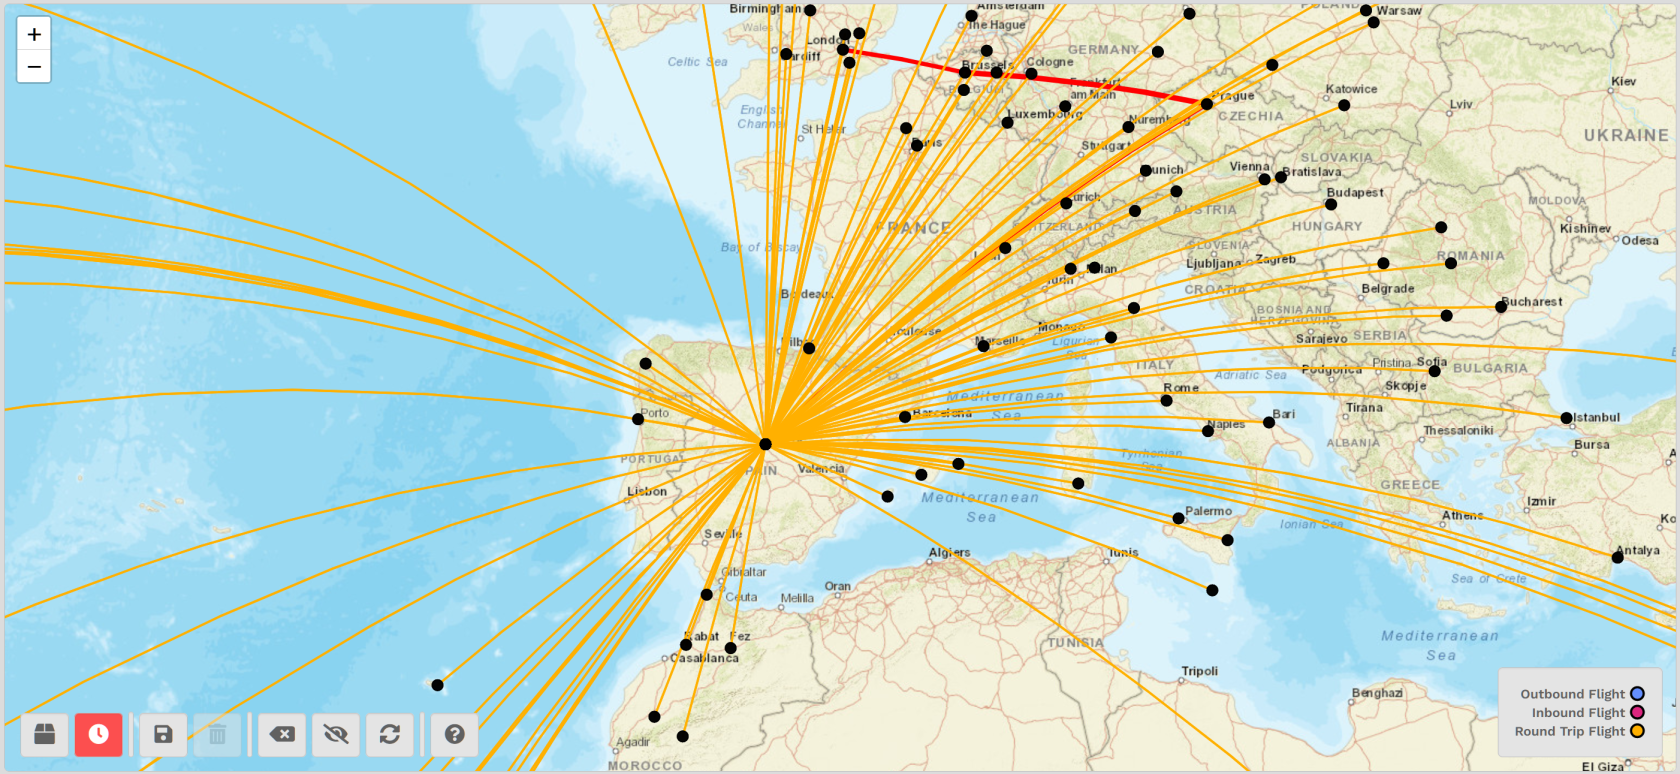
Picking any black dot, we settle on *EBBR Brussels Airport* for our next destination.
After the map updates, a **red** line indicates the flight route from *EGLL* > *EBBR –* and **all** of the **outbound** flight routes available from *EBBR*.
| [](https://docs.walkerair.us/uploads/images/gallery/2022-01/image-1642179148191.png) | If you add a route ***at any time*** during this process and decide that's **not** what you want to do, click the **Remove Last Airport** button to start over. |
[](https://docs.walkerair.us/uploads/images/gallery/2022-01/image-1642182479155.png)
From *EBBR*, select *LEMD Madrid Barajas Airport*.
After the map updates, a **red** line indicates the flight route from *EBBR* > *LEMD –* and **all** of the **outbound** flight routes available from *LEMD*.
[](https://docs.walkerair.us/uploads/images/gallery/2022-01/image-1642184140025.png)
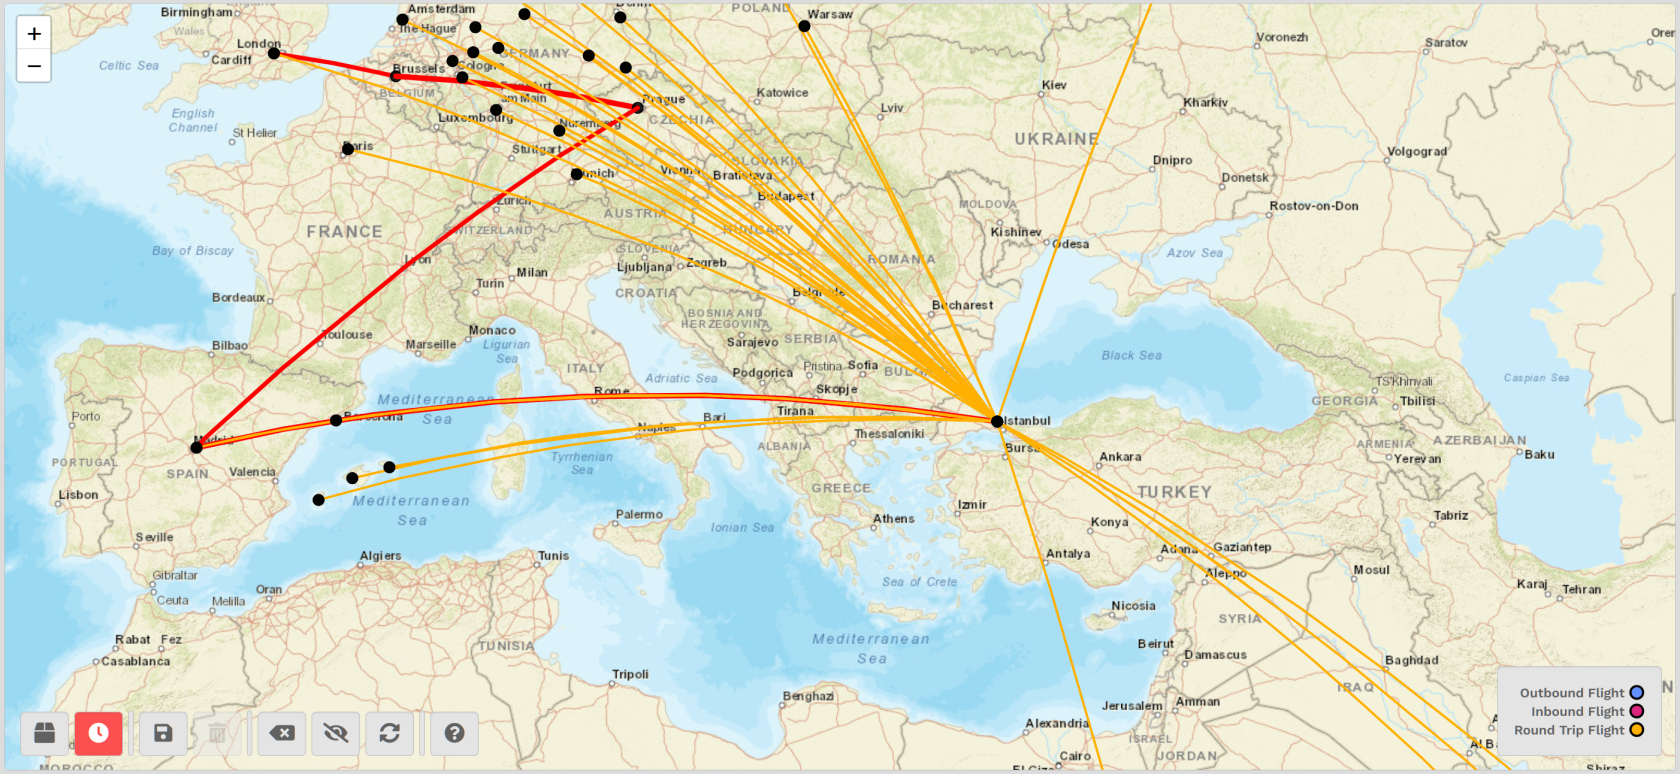
From *LEMD*, select *LTFM Istanbul Airport*.
After the map updates, a **red** line indicates the flight route from *LEMD* > *LTFM –* and **all** of the **outbound** flight routes available from *LTFM*.
[](https://docs.walkerair.us/uploads/images/gallery/2022-01/image-1642184313331.png)
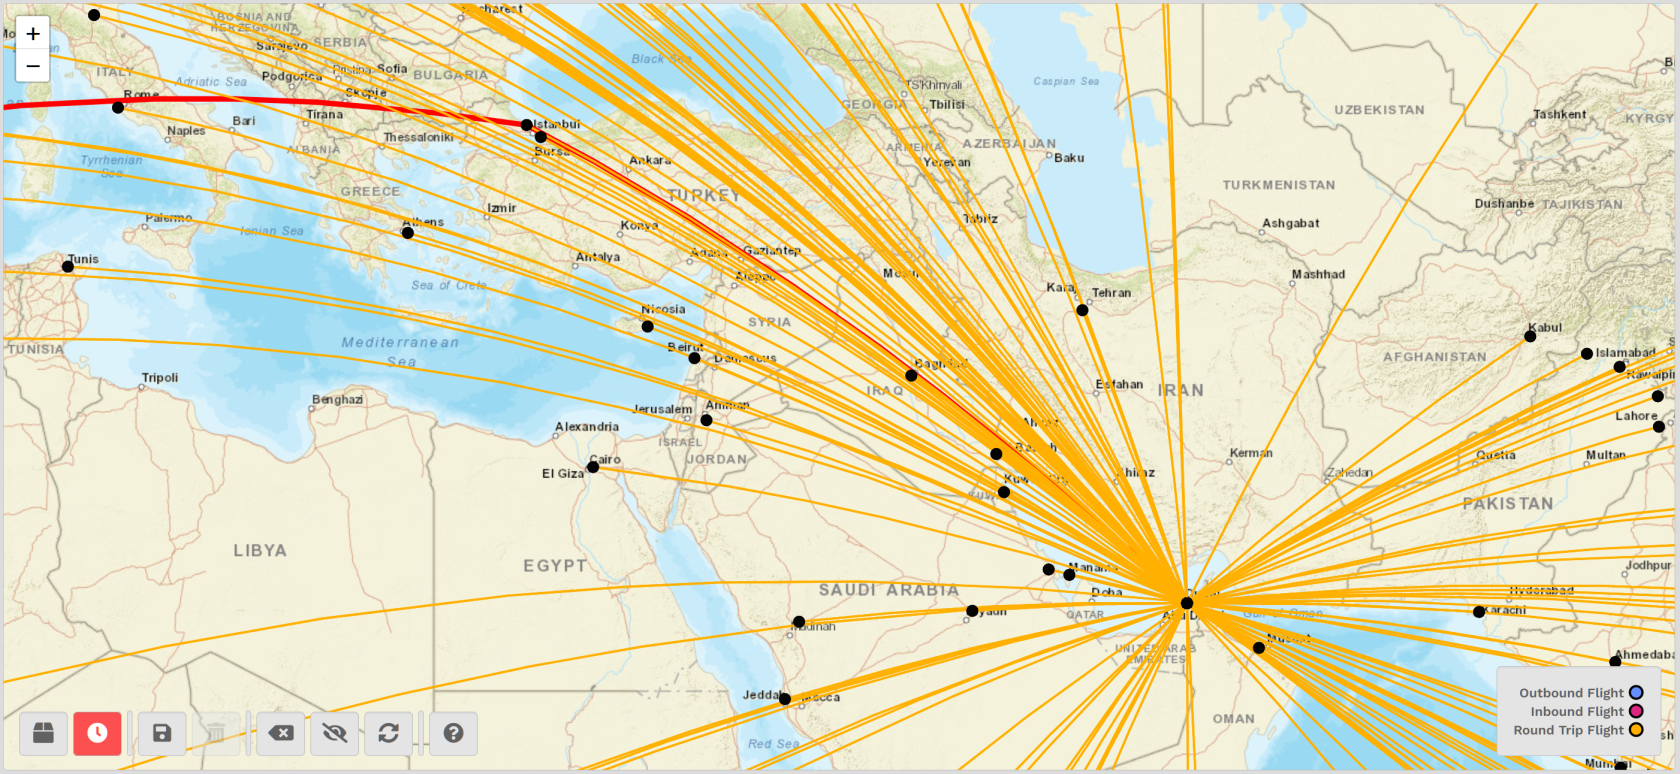
From *LTFM*, select *OMDB Dubai International Airport*.
After the map updates, a **red** line indicates the flight route from *LTFM* > *OMDB*.
We'll stop here; however, if you wished to continue to add more routes, you could do so by following the steps above.
[](https://docs.walkerair.us/uploads/images/gallery/2022-01/image-1642184433292.png)
After clicking the **Hide Available Routes** button, we're left with this...
[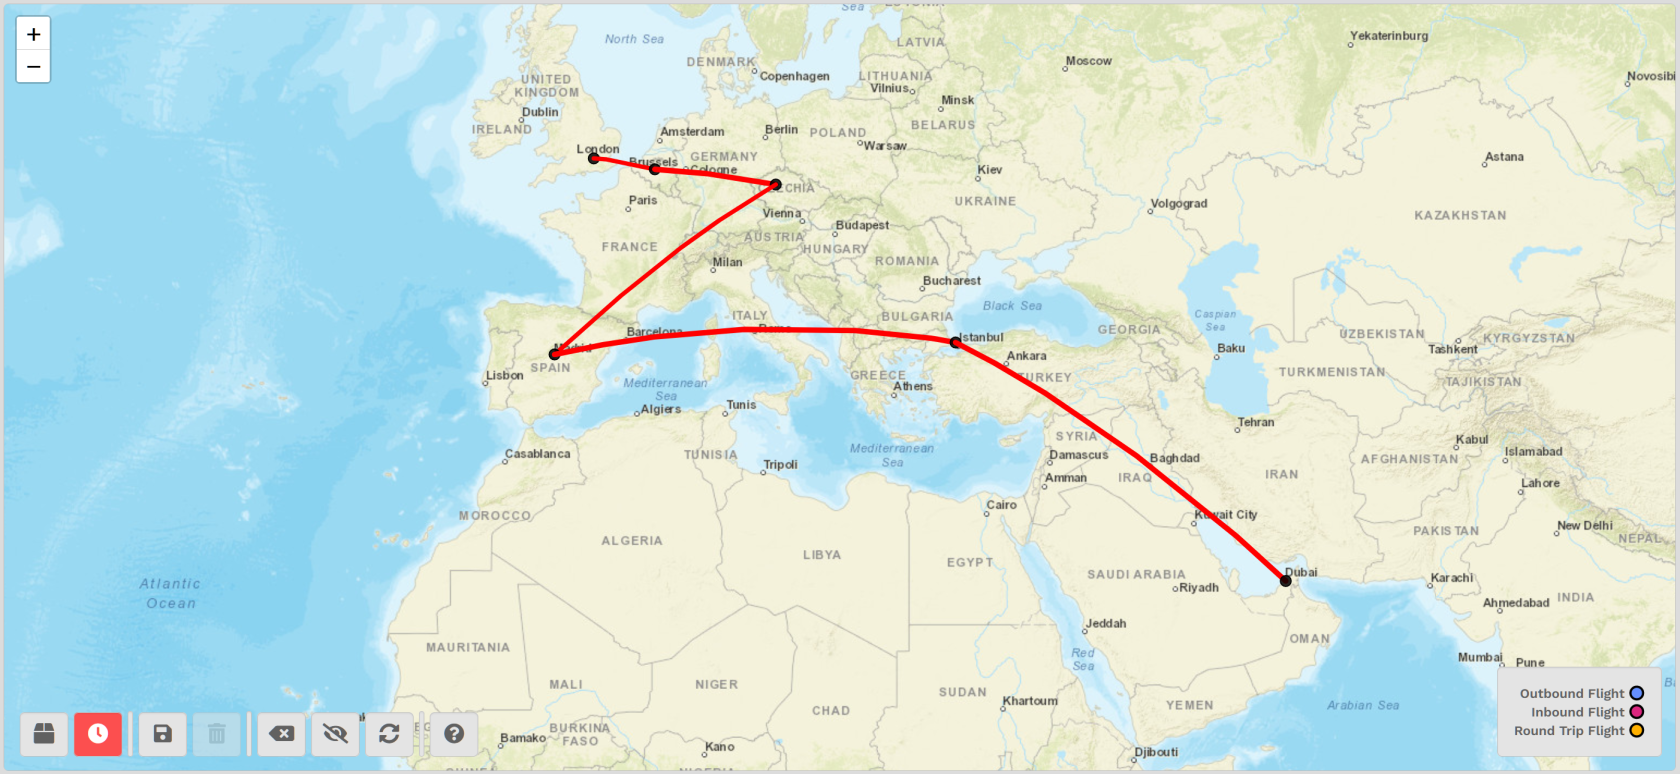](https://docs.walkerair.us/uploads/images/gallery/2022-01/image-1642184613415.png)
You now have some options...
| [](https://docs.walkerair.us/uploads/images/gallery/2022-01/image-1642181166913.png)
| If you wish to **save** this route, click the **Save Plan** button. |
| [](https://docs.walkerair.us/uploads/images/gallery/2022-01/image-1642186098911.png)
| If you wish to **delete** the route you saved, click the **Delete Plan** button. |
| [](https://docs.walkerair.us/uploads/images/gallery/2022-01/image-1642186177054.png)
| If you wish to **start over**, click the **Reload Map** button. |